|
Texas, Mexico, New York. I arrived 5-25-4 and unpacked. The actual wall is 82"x155" and ready for some cement board, lath, a rough scratch coat, a middle brown coat and a top intonaco coat. The bottom 3' of the wall will be oak. If I paint three square feet per day, equal to a 18"x54", that's a month's work. I still don't know what I'm going to paint as subject matter.
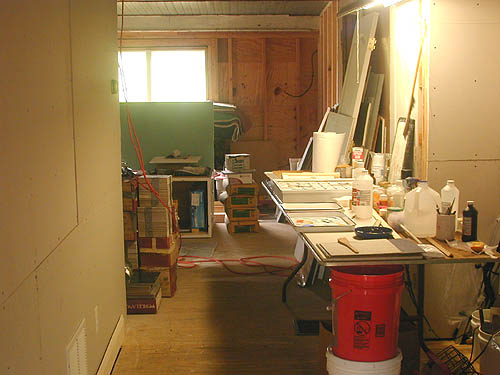
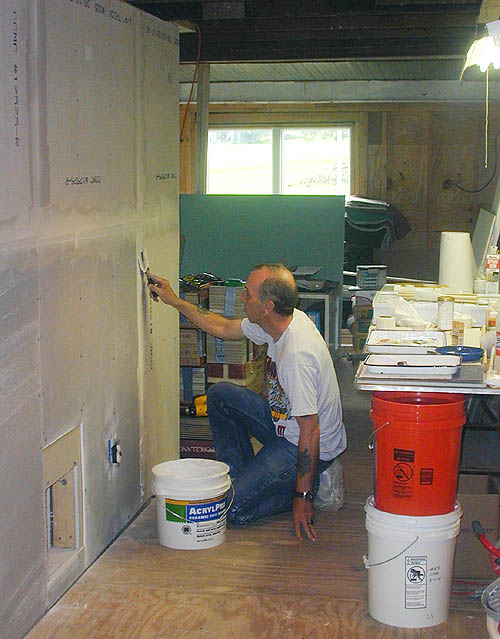
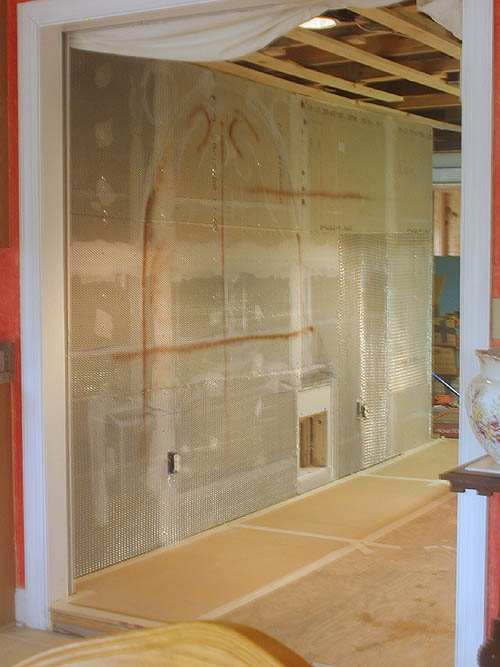
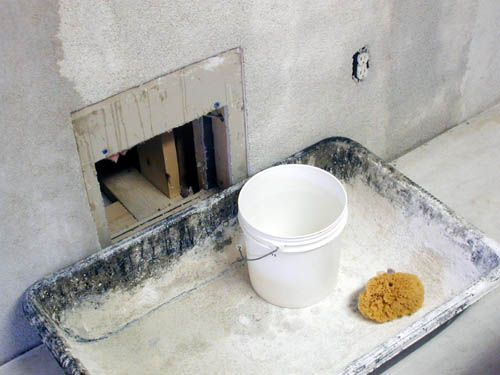
 This is the 82"x155" wall we will attach the sub board and metal lath on to. 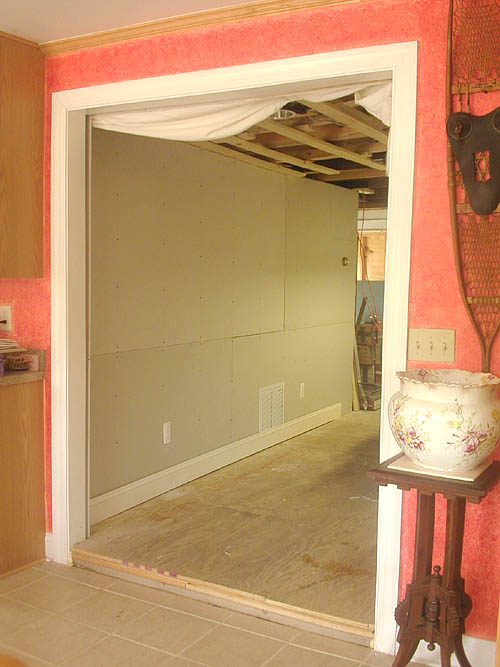 This is my working space setup, all safely shipped here for $425 in one week. That plus thirteen five gallon full buckets. 4 slaked lime, 2 large sand, 2 medium sand, 2 small white sand, 2 white cement, 1 dry lime.
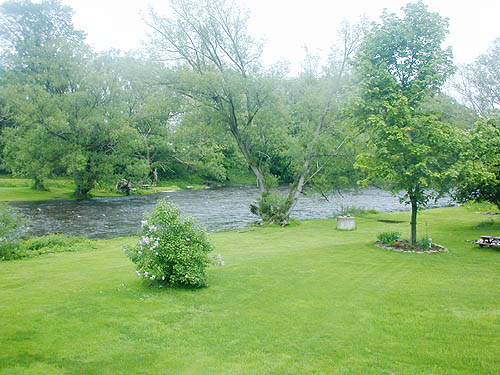
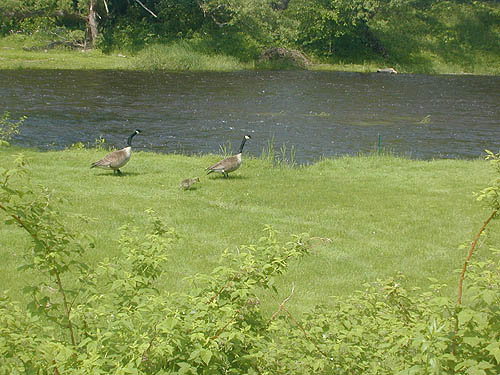
 This is the view out the back window. Beautiful, with the Little Salmon River just a stones through away. Two days later the cement backing board and lath were up. That's John Loyer helping me, he owns this great 200 year old house in little Texas, Mexico, New York. It's half of a mile from Lake Ontairo.
 Soak the previous mortar's dry edge before adding new mortar. The larger the mural, the larger the surrounding wet area should be. Lower areas of the mural stay wet longer. Attached mortar sets and dries faster, so paint your edges first. 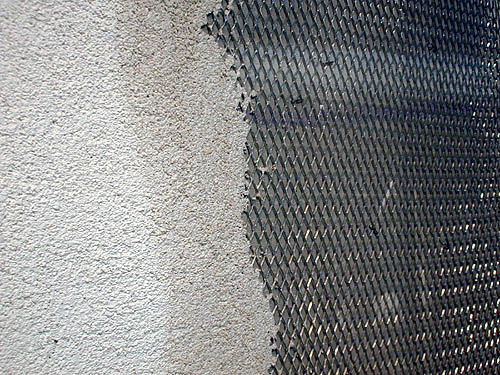
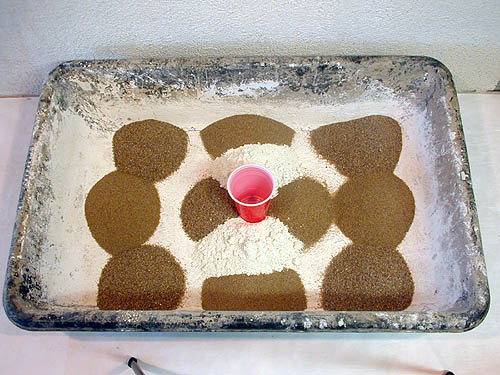
5-28-4, the cartoon paper is up on this scale fresco and I'm drawing on it in chalk. There is a head molding and foot board of marble, a ventilation vent and two electrical plugins to contend with. We decided on a 1 inch white tile as a protective bumper. That is going to be the painted porch railing and the gate's railing, all across the mural. Aqua-Net hair spray is a good fixative for pastel on paper. 5-29-4 I completely changed my mind about the subject of the mural. Below the ceramic tile chair bumper guard I will make a faux marble base. Above this will be a river painting. 5-30-4, I'm painting 'to scale' sized acrylics, in the morning and afternoon. One from 10 in the morning to 12 and one from 1:30 to 5 in the afternoon. Both on a 15x22, 1/4 inch plywood with cloth glued on it. 5-30-4, The top one I drew out with charcoal, the second with big washes of the local highlight color. With this technique you start with the big light areas and jump to the big darks. At the end it's very accurate. I'll use this technique on the fresco if I try to do the whole top 2/3 painting in one day. That's going to be some big brushes and sponges. The first technique lends itself to giornate cuts in the fresco to paint smaller sections each day. Deep down I want to use the second technique. Test, baking soda hardens the skin of lime just like alum. Dentist tooth molds are cast with this baking soda salt. Baking soda seems to make the skin harder by moving the lime to the outside of the form. It did nothing about making the inside hard, in fact I think it was softer. Alum on the other hand made the mortar harder throughout. White cement is used in pool building and it holds water a long time. It has no acrylic additives, only white pigment. My test was with Quick-set, which has an acrylic additive. Quick-set stuck to shiny marble but the white cement would not. 6-5-4, Saterday early afternoon. A very full day. The morning painting of the river was from 9 AM to 11 AM, lunch and lay the rough coat mortar. 16 oz. cup = 1 part.
6-6-4, I worked on the morning painting, the previous url, scaled acrylic painting.
6-8-4, Tuesday morning, the acrylic painting session went well. The alcohol and pigment painting test are drying from yesterday.
TIP: Thalo green is much harder to keep suspended, Thalo blue and transparent Indian yellow will make a more varied green that will darken nicely with transparent magenta PR122 or PR202. But, if you need a lot of that particular hue add lemon yellow. It suspends better. I made another section of the Rough coat and painted a full color wheel with these colors and lime water. Zecchi Indian Yellow nickel complex, D.S. Quin Red PV19, D.S. Quin violet PV19, Thalo Blue, it's a perfect color wheel. Geez that Pigment Color Chart is messed up. It's just not logical to have a color on each side of magenta that both have the same Pigment Color Number.
Something is wrong with the current Pigment Color System, red and violet shouldn't be the same Pigment Color Number. Cadmium red is PR108 from red to brown. You just can't tell what color you have from the number. This is good only if you are a chemist.
Pigments are additive, the primary triad of three transparent colors mix a dark without black pigment.
The lightest yellows, hansa, cad lemon, and lemon yellow chromate would be 36RCW#01.00.05, the darkest burnt umber would be 36RCW#01.10.09. (color 01 to 36, value 00 to 10, cool-warm 01 to 09)
Here is what tonight's colors look like.
Tonight, after the afternoon painting session I wet the mural and laid the first twenty eight square feet of Brown coat on the 82x155 mural. Ten sixteen ounce cups of medium sand, five cups of wet lime, 1.3 cups of water. Three and a half hours labor, after using the float trowel I gave it the once over with a sponge to make it a full rough. I'm going to get a sponge trowel for my next mural. One section down, three to go.
The next day, Saturday, June 12th. Second section brown coat, adding 1/4 teaspoon alum, I forgot in the first section.
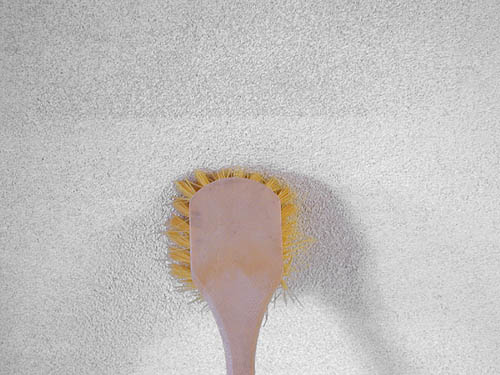
 I had to make a drastic change, I'm running out of medium sand and can't get more. The new Brown coat mix is 2 medium sand, 8 small sand, 6 wet lime, 1.25 water. It is a lot harder to get a grabbing surface, and it's very important to keep the wall wet. Sixteen square feet = 2 medium sand, 2 small sand, 3/4 water, 1/8th teaspoon alum. 5:00 finished the mural's Brown coat. Well done! Now it just has to set untouched for two days. My wrists hurt. 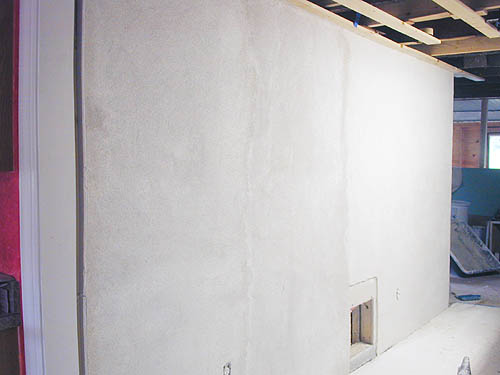 If you don't lay the intonaco while the brown coat is still in it's wet setting stages, you must remove the dried extra lime and calcium carbonate from the surface and expose the sand, like the top third in the photo below. Any dry strong scrub brush will do, this one had a long handle and gave good leverage. This is an important step if you are working on ceilings.
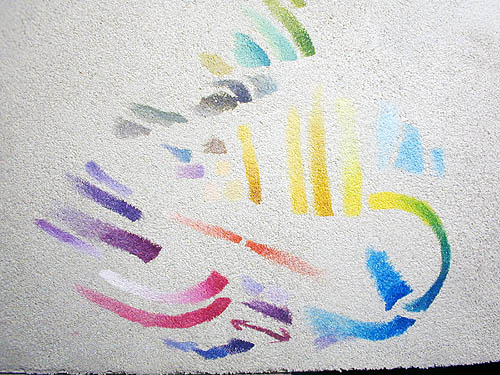
 This is a test with lime water medium on lime mortar, 3 colors. 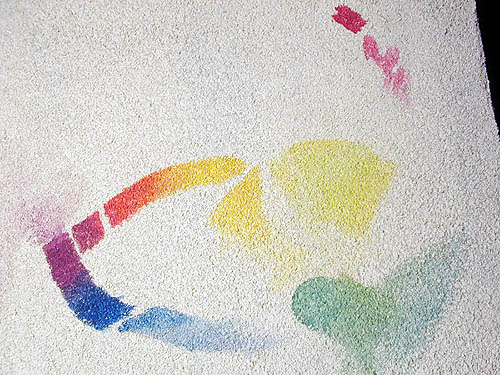 This is a test with alcohol medium, 3 colors. The only way to get a cyan hue is with alcohol as the medium, lime water makes a more blue color. D.S quinacridone PR202 magenta can be made with D.S. PV19 quinacridone red and PR122 quinacridone violet, quinacridone red is on the warm side for your only magenta but is still able to make reds and neutral darks with green to turquoise. It will also make an exceptable blue but not as good as quinacridone violet or quinacridone magenta will.
 Into the mortar of 1 lime, 1 white cement and 2 small white sand. I'll add the color with lime water and cover it with a layer of cera colla water wax and buff it up. That's the way the Egyptians did it. 6-21-4, laid the first giornate of the faux marble base on the 12x24. I added indanthrone blue to the mortar. On the 82x155 mural I laid it 1/4 inch thick, 1 lime, 1 white cement, 2 small white sand, 2.5 water. I left it pure white, added color will be in secco, than wax cera colla as a gloss finish and binder for the pigment.
6-22-4, It's raining this morning, I'll lay another section of intonaco on the faux base. 3:3:6:2.5. Finished, 1 hour forty five minutes. Plus wet-down 2 hours and 1/2 hour cleanup. 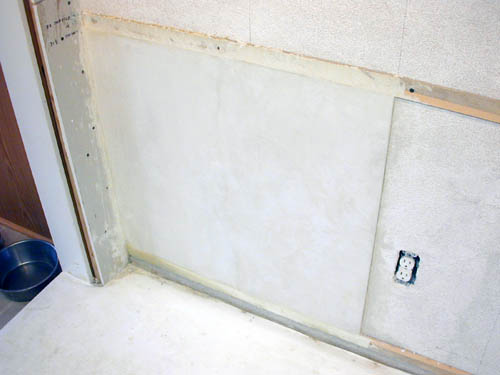 6-29-4, We decided this bottom area would be oak wood instead of fresco. The area needs some protection. 6-17-4, Since I have been removing dry intonaco from my scale model I realize just how soft lime is. I wish I could test and scrape a little off a 10 and a 100 year old fresco. Just to see how hard the intonaco it was. I believe the crust is very hard and brittle, the inside is easy to turn to dust, it just seems like I have already done it because I remember my surprise popping through the shiny crust.
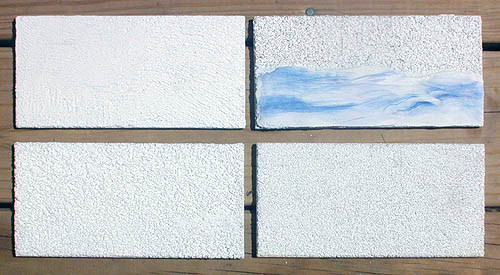
I'm going to use white cement in the intonaco mortar, maybe. I'll make a giornate area on the 12x24 scale model first. (A, lower tile) 10:15 tile #1, 3"x8", 6-17-4, left side 1/8th thick, white cement 1:1 small white sand. Top = alcohol medium, I put a stroke of color with alcohol and color. The alcohol floated because it could not absorb yet, too much unabsorbed water. It left the surrounding surface shiny and the colored stroke matt. Alcohol and water only mix up to a point.
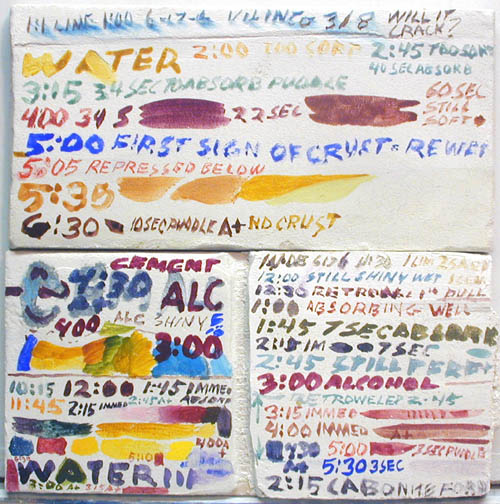 6-22-4, (E upper tile) tile #2, five days later I washed the upper white lime 1:1 sand tile (E). It's all good news. The 1/4 inch thick mortar did not crack, the lime I use on Maui would have cracked anything over 1/8 inch cracked. What I learned: Three hours after laying the intonaco it was still a little soft, in four hours crust was forming. This is when it should be re-troweled to paint with an even absorption. I painted on the tile for an hour and a half, no new crust formed and I sure I could have painted two more hours or more. It's not as hard as as the tile (A) which is white cement and sand on one side and 1 lime, 1 white cement and 1 sand on the other. All the colors are absorbed and permanent. The 5:00 line of copy with Sinopia ultramarine blue for fresco absorbed well where the lime crust allowed it to be absorbed. 6-19-4, Here is the tile (A) cement 1:1 sand. Washed two days later. 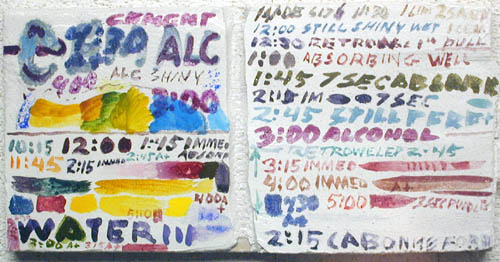 6-22-4, Here is the tile (E) lime 1:1 sand. Washed five days later. 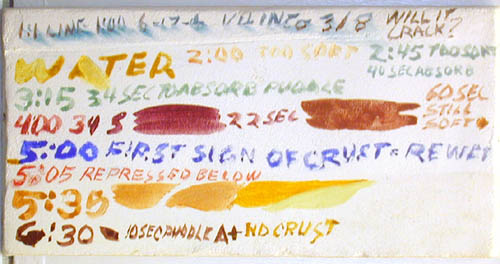 (B) 6-17-4, 1, 8"x8", tile (photo). 1 cement 1 small sand. 50/50 water/additive instead of just water. Covered with alcohol after adding pigments and leveling. Next day, it shines in places, very hard. 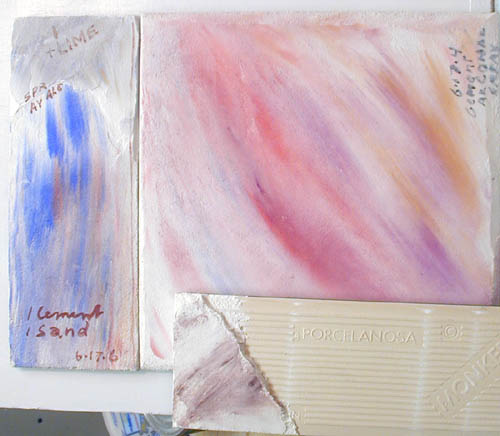 (C) 6-17-4, 1, 3"x8" tile (same photo). 1 cement, 1 sand, (2nd small area =) 1 added lime. Sprayed with alcohol after adding pigments and leveling. Sprayed with alcohol. = Next day, it is strong, white and shiny. The alcohol spray wasn't necessary.
(F) 6-17-6, 1/4", 3"X8" tile (same photo), 2 cement 1 sand, made with alcohol, not water. Two days later I could not tell the difference between using alcohol or water made cement. Cement without lime does not shine.
Here is a link in the chemistry section, RCW Color Course - Pigments, Chemistry. final.htm#CHEMICAL,-CHEMISTRY That's where this info comes from. ACID-
ALKALI-
ALUM- Alkali. A double sulfate of aluminum and potassium crystal, a 5% solution will harden hide glue, gelatin and all proteins. It makes gypsum and calcium hard. Alum is a mortar for dyeing textiles. It's an astringent. Brown beeswax can be whitened by boiling it in alum water. Borax, like alum, is an alkali, in ancient day's it was called "tin-cal", a Chinese word. Borax is found in landlocked lakes in Tibet and in the Dead Sea, where it was gathered and used in India as a textile mordant and in Egypt as a flux ingredient to make frit, an isolated copper pigment in glass. It was also used to make a water varnish from stick-lac, the alcohol based tree sap pigments could also be made water soluble in a borax solution. There is more data in, LAKE-MINERALS Limestone is a sedimentary mineral cemented by calcium carbonate and is made of once living organisms, the dissolved mineral is calcite.
Today, 6-28-6, we have pigments that are lime and sulfur resistant. Sinopia sells them. This is leaning me towards an intonaco coat made of commercial white cement and small white sand or small crushed raw limestone sold as crushed marble meal and dust. Gypsum's are crystals of hydrous calcium sulfate, crystal deposits formed as precipitates from sea water.
Gypsum, after being heated loses most of its sulfur and becomes plaster of Paris. CEMENT, like in Portland Cement, is made from heated gypsum, sand and alumina, the oxide of aluminum present in clay. That makes cement hydraulic, it absorbs water and the gypsum cement sets quickly, even under water. The addition of Alumina, present in clay, is the reason cement dries underwater. Both white and gray cement harden under water by this chemical reaction. The white cement I tested took two days to harden under water.
Heated gypsum burns off sulfur as it becomes cement, any traces left behind would be bad for some mural pigments. So don't use gypsum plaster of Paris for murals, use limestone lime.
The first Scratch Coat or Rough Coat is 2-3 rough sand to 1 lime mortar.
CEMENT FONDU is a cement with a high aluminum content, KEENE CEMENT has alum salts added and makes a very hard mass. CASEIN CEMENT, casein added to cement makes it harder and set faster. Not good for fresco, paint chips off. |
NEXT FRESCO PAGE, #52 Large Little Salmon River Morning, Fresco Mural Base. fresco1mural-baseRCW.htm
PREVIOUS FRESCO PAGE, #50 Small Scaled Mural Fresco. fresco1mexico12x25.htm
JOIN, PAINTING ON LOCATION, COLOR FORUM